Unlock Your Photography Potential: Discover the Perfect Monopod for Beginners!
Stability is a crucial element in photography, and for beginners, mastering this aspect can significantly enhance the quality of their images. One essential tool that can help achieve this stability is a monopod. Unlike tripods, which can be cumbersome and less mobile, monopods are designed to provide support while maintaining portability. They are particularly valuable for those just starting out, as they are usually more budget-friendly and easier to use. Many newcomers to photography find themselves overwhelmed by the equipment choices available, but a good monopod can serve as a gateway to better shots without breaking the bank. Investing in a budget-friendly monopod allows beginners to explore their creativity and develop their skills without the pressure of high costs.
Understanding Monopods: What They Are and How They Work
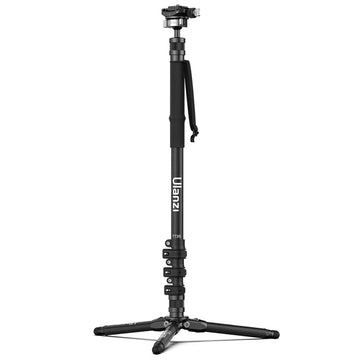
Monopods, as the name suggests, are single-legged supports designed to stabilize cameras and camcorders. Their structure typically consists of an extendable pole with a mounting head at the top, where the camera is attached. Unlike tripods, which offer three points of contact with the ground, monopods provide just one; this makes them lighter, more compact, and easier to carry around. For beginners, using a monopod can be particularly advantageous during events like sporting matches or wildlife photography, where quick movements and repositioning are essential. Monopods help reduce camera shake, especially at slower shutter speeds, allowing photographers to capture sharper images without the need for bulky equipment. This ease of use combined with their portability makes monopods an excellent choice for those new to photography.
Key Features to Look for in a Budget-Friendly Monopod
When shopping for a monopod, there are several key features to consider that can greatly affect your experience. First, weight is an important factor; a lightweight monopod is easier to carry around, especially for longer shoots. Look for materials like aluminum, which offer a good balance of strength and weight. Height is another crucial feature; a monopod should extend tall enough for your shooting needs, but also compact enough for easy transport. Locking mechanisms are vital as well—choose a monopod with secure and reliable locks to ensure stability during use. Beginners should also consider the grip and foot design; a comfortable grip can make a significant difference in handling, while a sturdy foot can provide better stability on various surfaces. These features may seem small, but they play a big role in the overall functionality of a monopod.
Tips for Using a Monopod Effectively
To get the most out of your monopod, here are some practical tips for beginners. First, adjust the height of the monopod to match your shooting angle; standing too tall or too short can lead to awkward positioning and poor shots. Always keep your camera steady by using both hands—one on the camera and the other on the monopod for added support. When shooting in different environments, consider adjusting your settings; for instance, use faster shutter speeds in bright conditions to avoid overexposure while allowing for some motion blur in low-light settings for creative effects. Positioning the monopod close to your body can also enhance stability, creating a sturdy base. Lastly, practice regularly; the more you use your monopod, the more instinctive the handling will become, leading to improved photography skills over time.
Common Mistakes to Avoid When Starting with a Monopod
As with any new equipment, there are common mistakes beginners make when starting with a monopod. One of the most frequent pitfalls is incorrect height adjustment; failing to properly extend or lower the monopod can lead to unflattering angles and missed opportunities. Additionally, improper stabilization techniques are common; relying solely on the monopod without engaging your core for support can result in shaky shots. Another mistake is neglecting to practice; using a monopod effectively requires familiarity and comfort. Not dedicating time to practice can lead to frustration and a lack of confidence. Remember, photography is an art form that improves with experience, so take the time to learn and experiment with your monopod.
Enhancing Photography Skills with Monopods
In summary, a budget-friendly monopod can be a game-changer for beginners looking to enhance their photography skills. By understanding the basic principles of monopods, recognizing key features to consider, and applying effective usage tips, aspiring photographers can significantly improve their image quality. Avoiding common mistakes will further ensure a positive experience as you embark on your photographic journey. With the right monopod, you can confidently explore new techniques and capture stunning images while developing your unique photographic style.